Search

Edge Trims for Wall Tiles

Complete your self-adhesive wall tiling job with smart accessories.

Vinyl Home -Gift Card

Shopping for someone else? Treat them with a DIY gift card and let them select their favourite design.

Tool Bundle
Get all the tools you need for your project

Equip yourself with the right tools and take your DIY project to the next level!

New

Upgrade your home with Reflective Mirror Window Film.

Specifications

Thickness:0.2mm
Material:
Multi-Layer Composite (Protective Outer Layer / Static Cling Adhesive / Heat Insulation Core / High-Definition Pigment / UV Filtering Layer / Wearable Layer)
Brand: Peel & Stick Hub
Manufacturing Country: China

PROUDLY NZ owned & operated
ORDERS SHIP in 1 business day
EASY RETURNS within 30 days*

Mirror Reflective Film | Static Cling Window Film - EXTRA WIDE 120cm x 5m

Mirror Reflective Film | Static Cling Window Film - EXTRA WIDE 120cm x 5m

Transform Your Space with Mirror Window Film

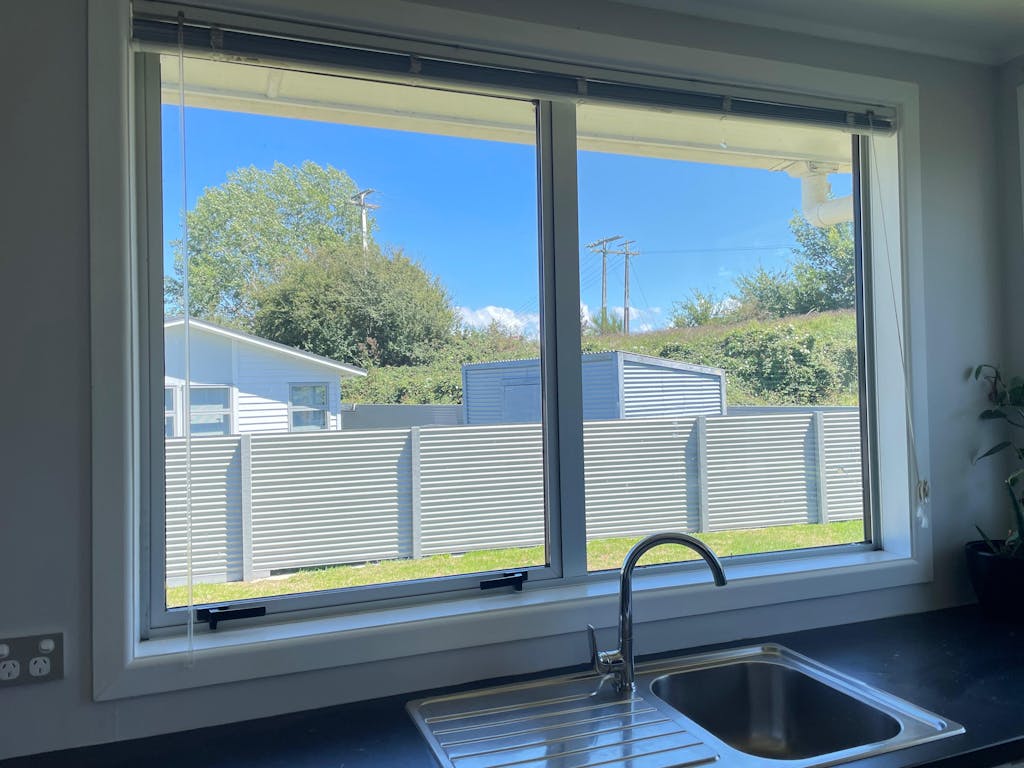
Upgrade your home’s privacy and energy efficiency with our Static Cling Reflective Window Film. This high-performance film provides a sleek, modern look while acting as a shield against heat, glare, and prying eyes. Measuring 120cm x 5m, it is the perfect DIY solution for large windows, ranch sliders and glass doors.

How the Mirror Effect Works

It is important to understand that the "mirror" effect is determined by light intensity. The side with the most light will see a reflection, while the side with less light can see through.

  • Daytime (Maximum Privacy): During the day, the sun makes the outside much brighter than the interior. People outside will see a clear mirror reflection, while you enjoy a crystal-clear view of the outdoors.

  • Nighttime (Lights On): When it is dark outside and your interior lights are on, the effect reverses. The interior becomes the "bright" side, meaning the window will look like a mirror from the inside, and people outside will be able to see in.

Pro Tip: We recommend using curtains or blinds at night for total privacy.

  • Advanced Heat Insulation: Blocks up to 92% of Infrared Rays, keeping your home significantly cooler in the summer and reducing your energy bills.

  • UV Protection: Built-in UV layers protect your skin and prevent your furniture and flooring from fading.

  • Glare Reduction: Softens harsh direct sunlight, making it easier to see TV screens and monitors without squinting.

  • No-Glue Static Cling: Uses water for application rather than messy adhesives. This means it’s easy to reposition during installation and leaves zero residue when removed.

  • Durable Multi-Layer Construction: Features a wearable scratch-resistant layer, pigment layer, and a protective backing for long-lasting performance.

Easy 6-Step Installation Guide

1. Clean & Prep Thoroughly wash the window glass. Ensure the surface is 100% free of dust, grease, and debris. Any tiny speck trapped under the film will create a visible bubble.

2. Measure & Cut You have two options for a perfect fit:

  • The Pre-Cut Method: Measure your pane and cut the film to size beforehand, leaving a 1–2mm gap at all edges for easy water drainage.

  • The Pro-Trim Method: Apply a slightly oversized piece of film and trim it directly on the glass using a metal edge ruler and a sharp craft knife.

  • Critical Tip: Ensure the film sits only on the glass and does not touch the window seal or frame. If the film overlaps the seal, it will allow air underneath, causing the edges to lift.

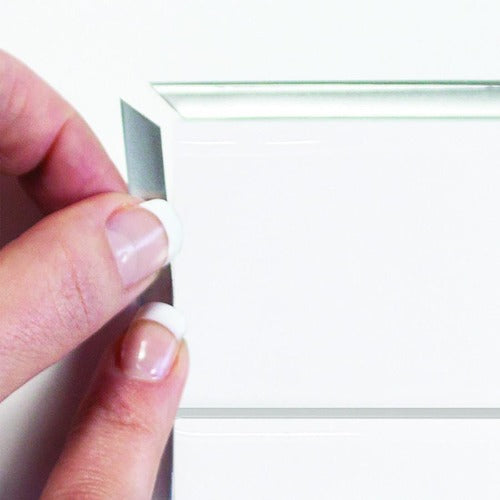
3. Remove the Backing Film

Identify the clear protective backing film and peel it away. This is easiest to do while the film islaying flat on a clean table.

Pro Tip: Use two pieces of scotch tape on opposite sides of one corner to pull the layers apart effortlessly.

Handle with Care: The film is highly delicate once the backing is removed. It is vital to handle it gently to ensure it does not fold or crease; once a crinkle or fold is made, it becomes permanent and will not disappear after installation.

4. Spray Generously Create a solution of water and a few drops of dish soap. Generously spray both the window glass and the "Apply" side of the film (the black side that was against the backing paper, the mirror side faces inwards to your room). The more water you use, the easier it is to slide the film into the perfect position.

5. Apply to Glass Place the wet black side of the film onto the wet window. Since it is static cling, you can easily slide and reposition it until it is perfectly aligned.

6. Squeegee & Finish Using a squeegee or a flat plastic card, push all water and air bubbles out from the centre toward the edges. Wipe away excess water with a lint-free towel.

⚠️ IMPORTANT: Safety Installation Note

To ensure the longevity of your glass, always cover the entire window pane from edge to edge. Applying the film to only a portion of the glass creates a significant temperature imbalance between the covered (cool) and uncovered (hot) areas. This thermal stress can lead to "thermal shock," which may cause the glass to crack or break.

  • sold as a roll
  • adds privacy to your windows but doesn't block out the light
  • adheres with static technology. No glue!
  • easy to apply with a squeegee without getting any air bubbles
  • protects your furnishings from fading
  • easy to wipe clean
  • easy to remove
  • can be reused over and over again
  • environmentally manufactured

Static cling window film are ideal for the bedroom, bathroom, shower glass, kitchen, the office or the narrow window at the front door where everyone can see straight through. It is also suitable as décor on glass doors and mirrors.

If you are unsure of what design to choose for your project, we recommend that you order a sample first.

  1. Measure the height and width of the window
  2. Read the product description carefully so that you know which way the design goes
  3. Most of our window film rolls are 1.5m long and 45cm, 67.5cm, 90cm or 120cm wide.
  4. If one roll isn't enough to cover the entire window, the film can in most cases be butt joined with a second roll. Please note that for most of our film the entire window doesn't need to be covered. It can also be nice to build up panels leaving a small gap between.

For a successful installation you will need:

  • window cleaner
  • cloth
  • tape measure
  • application kit (craft knife & squeegee)
  • metal edge ruler
  • craft mat
  • pen

To achieve the best result we recommend that the window film is applied with our application kit. The applicator has a velvet edge which gives a smooth application that won't damage the surface.

Save time and order from our carefully selected tools.

The window film is very easy to apply, just:

  1. clean your windows
  2. measure the windows and cut the film to the desired dimensions, leaving 2mm gap around all edges
  3. spray your windows with water and a few drops of wash up liquid
  4. remove the backing paper
  5. place the the film on the glass surface (2mm minimum from the edge) and glide it into position
  6. start from the centre and squeeze out all water with a squeegee
  7. wipe dry with a towel.

If you would like to know more about window film we recommend that you read our FAQs. For tips and tricks on how apply, care and remove your window film watch our installation tutorials.

This video shows how you apply static cling window film.

How to care for you window film

  • Clean with soapy water or normal window cleaner and a damp cloth.
  • Avoid using cleaning products containing chlorine that can bleach or discolour the film.

These are the most common reasons why the window film doesn't stay up:

1. The backing paper isn't removed. There is one even if it doesn't look like one. It's clear in colour.
2. The film is touching the edges somewhere. If it does, air will appear underneath and it will lose its cling. It's safest to leave a minimum of a 2-5mm gap so it doesn't touch the window seal.
3. The window film is applied to a textured glass. If it is, air will come underneath and it will lose its cling. Instead use a self-adhesive film for those surfaces.
4. The glass has already got some kind of film on it (e.g. UV protection / tint etc).
5. Not enough water has been sprayed on the glass surface during application. The more the better to achieve a better cling. Then make sure you squeeze out as much water as possible and let the sun burn off the rest. (Maybe keep the window closed for a day or so until the sun has done its part)
6. The wrong side of the window film is facing the window. Make sure it's the cling side. It's nice and smooth.
7. The windows are not properly cleaned before application. Make sure they are cleaned from grease and dust. This goes for the film too if it's being reapplied or has been applied to a not fully clean window.

Watch this video

Search

PROUDLY NZ owned & operated
ORDERS SHIP in 1 business day
EASY RETURNS within 30 days*
EASY INSTALLATION FREE tutorials
PROUDLY NZ owned & operated
ORDERS SHIP in 1 business day
EASY RETURNS within 30 days
PREMIUM TILES
EASY INSTALLATION
NO GROUT NEEDED
EASY TO CLEAN
HEAT & HUMIDITY RESISTANT
APPLY OVER EXISTING TILES
GUARANTEED TO STICK
AFFORDABLE AND HASSLE-FREE
EASY INSTALLATION
REPOSITION-ABLE
EASY TO CLEAN
RESISTANT TO MOISTURE & HEAT
CUT WITH CRAFT KNIFE
Premium trusted brand
Easy installation
No grout needed
Easy to clean
Heat & humidity resistant
Apply over existing tiles
Cut with craft knife
Guaranteed to stick
Affordable & Hassle-free Solution
Easy installation
Top quality
Easy to clean
Resistant to moisture & heat
Cut with craft knife
Easy installation
95% UV protection
Privacy film
Remove & Reuse
Easy installation
99% UV protection
45% protection against direct heat radiation
Remove & Reuse
Easy installation
99% UV protection
60% protection against direct heat radiation
Privacy & Glare protection
Remove & Reuse
Easy installation
Apply over existing tiles
Easy to clean
3D design
Suitable for wet areas when sealed
Easy installation
Waterproof
Skidproof
Strong Viscosity
Easy installation
Waterproof
Skidproof
Food safe
Dishwasher safe
Easy installation
Waterproof
Skidproof
Laundry safe
Premium thickness
Easy installation
Cut with craft knife
No grout or mortar needed
Apply over existing tiles
Hides old grout lines
Heat & humidity resistant
Easy to clean
Extra strong glue
Removable & Repositionable No residue, no damage — perfect for temporary upgrades
Easy to clean Low-maintenance surfaces that wipe clean with ease
No Tools Required Peel-and-stick designs that anyone can install
Landlord-Friendly Options Protective install methods for peace of mind
Tested by Renters Across NZ & AU Real-life results from real rental homes
Budget friendly
Easy installation
Flexible & Lightweight
No grout needed
Heat & humidity resistant
Cut with craft knife
Budget friendly
Easy installation
Hides old grout lines
No grout needed
Heat & humidity resistant
Cut with craft knife
Premium thickness
Easy installation
Hides old grout lines
No grout needed
Heat & humidity resistant
Cut with craft knife
GUARANTEED TO STICK
PROUDLY NZ owned & operated
ORDERS SHIP in 1 business day
EASY RETURNS within 30 days*
122cm Extra Wide / Continuous Length
Easy installation
3D Surface Wrapping
Easy to clean
B1 Grade Fire Protection
Cut with craft knife
PROUDLY NZ owned & operated
ORDERS SHIP in 1 business day
PROTECTIVE PACKAGING shipped in extra thick boxes